
Step 1. Choose a good skirt to work with. This particular technique works best with wool-like skirts. If this is your first time for hemming a skirt, look for one that is unlined and straighter vs. fuller. The less material, the easier it will be to work with. Also look at the existing hem. If it is a blind hem, then you know that a shorter length with a blind hem will work well. Don't forget to take your before photo!

Step 2. Try on the skirt and mark the length that you would like it to be with a straight pin. You could also measure off of a skirt you already own that you know will be a good length. I usually shoot for finger-tip length, then I know it will be appropriate for school. If this is your first time shortening a skirt, I would aim for the conservative side. You can always go shorter later, but you can't add length back on.
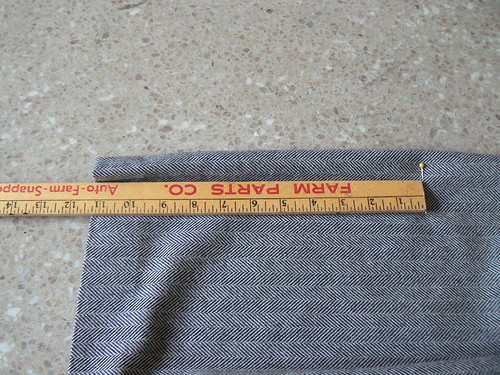
Step 3. Take off the skirt and measure down to the hem to get the length that you need to remove. In my case, it is 11.25 inches
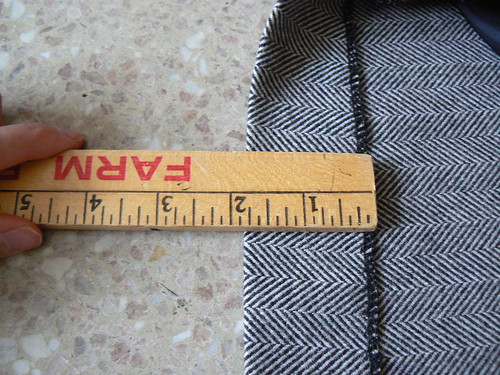 Step 4. Measure the existing hem to know what length to make the new hem. These types of skirts generally have a hem that is around 1.5 inches. My was 1.75.
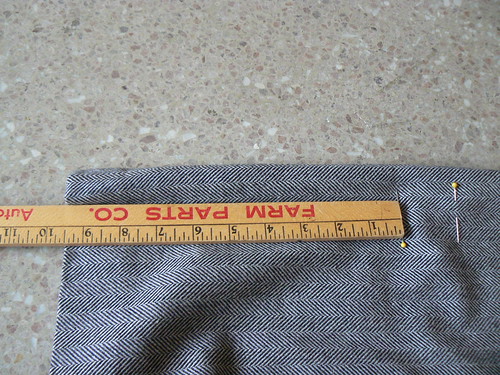 Step 5. Subtract the length of the hem from the length that needs to be removed. In my case, 11.25 - 1.75 = 9.5. Put a new pin at this new length.
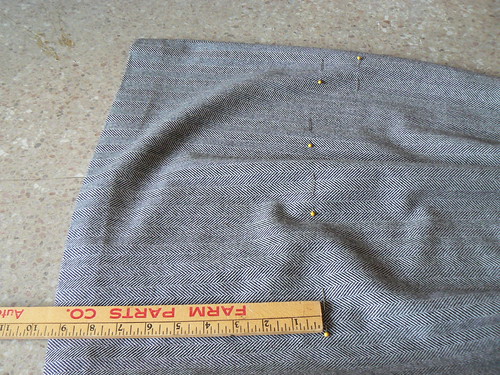 Step 6. Measure at several places across the skirt putting a pin at the new length. I can usually get away with 5 pins across the front. First-timers might want to use a few more. You don't want to cut the skirt straight across. Most skirt hems curve slightly.
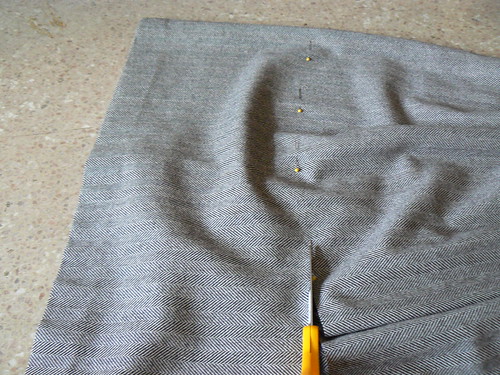
 Step 7. Cut up the side seam to the pins.
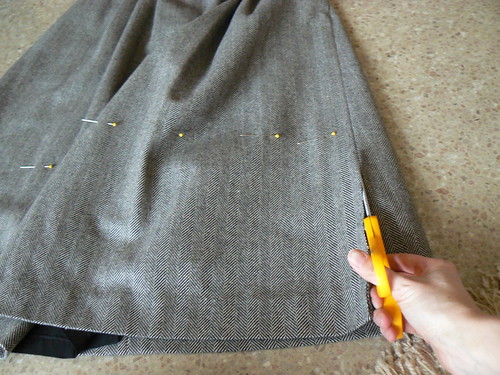
Step 8. Start cutting across the front of the skirt. Getting as close as possible to the pins. Repeat the pinning and cutting process on the back.
 Step 9. Make a zig-zag stitch all the way around the bottom of the skirt. This will keep the fabric from fraying.
 Step 10. Fold the edge over to make the hem using the measurement from earlier. Pin all the way around.
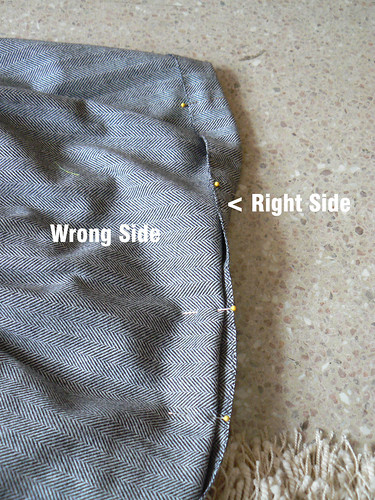
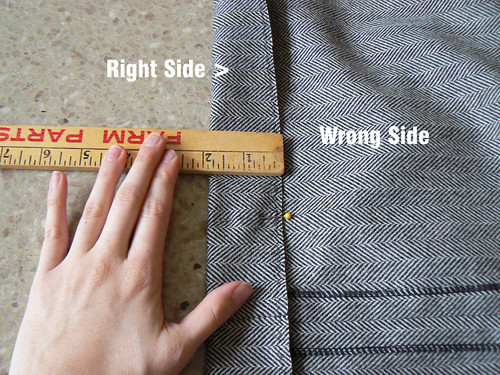
Step 11. Now the tricky part, folding it properly for the blind hem. Lay the skirt with the wrong side facing up. Fold the hem underneath so that there is 1/4 inch of the edge exposed. Repin.
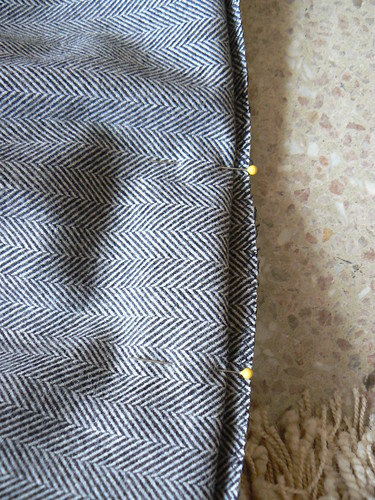 Your final folding should look like this. The wrong side of fabric facing up, the hem folded underneath, and aproximately 1/4 inch of the edge exposed.
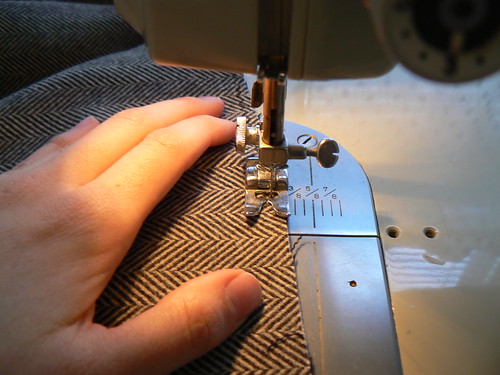
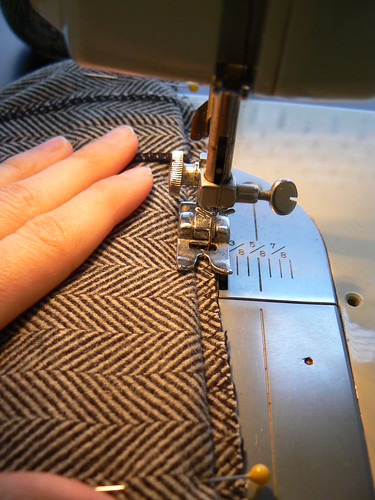 Step 12. Set sewing machine to blind hem (check instruction book for setting). Your skirt should be laying wrong side up with the the 1/4 inch exposed edge facing the inside of the machine. The actual blind stitch will vary between machines. Mine does two straight stitches on the exposed edge and then one stitch through the folded fabric.
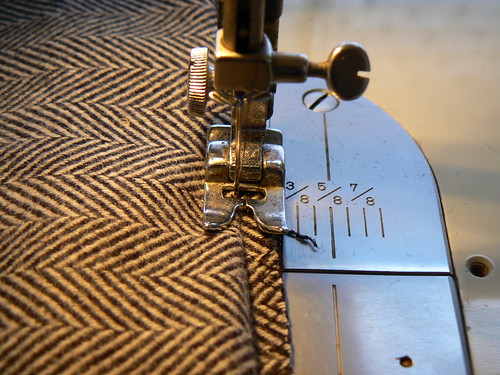 The key to getting a good blind hem is to barely catch the edge of the folded fabric. I'm talking millimeters. This is the stitch that will be visible on the front. You want it to be as close to the edge of the fold as possible, therefore, small as possible. If your stitch is too far to the left of that fold, you will have a large visible stitch on the front and the hem will not lay flat. If you have never done a blind hem, I recommend practicing with a scrap of fabric, perhaps the one you cut off the bottom of the skirt. It is also a good idea to sew painfully slow when you are first learning to blind hem. Be slow and methodical, but don't sweat it. If it's messed up, you can also rip the hem out and try again.

Step 13. Once you've sewn a blind hem all the way around, be sure to iron your new hem. It will be a nice finishing touch. Finally, take your after photo and show off your handiwork to all your friends.
All right, that's it. My first tutorial. Hopefully I was clear enough in all my instructions. If you have any questions, be sure to let me know.
Edit: If you hem a skirt using this tutorial, be sure to let me know. I want to see photos!

No comments:
Post a Comment